[Data Engineering] Docker-compose로 Airflow설치하기
docker-compose로 Airflow설치하고 실행해보기
[Data Engineering] Docker-compose로 Airflow설치하기
Airflow 설치
1
curl -LfO 'https://airflow.apache.org/docs/apache-airflow/2.10.5/docker-compose.yaml'
위 명령어를 실행하면 docker-compose.yaml이 생성이 됩니다. 이때 docker-compose.yaml에 들어가서 자신이 원하는 설정을 하시면됩니다.
저의 경우 default로 실행 시 Example이 나오기에 load_example을 False로 설정하였습니다.
1
docker-compose up
위 명령어를 실행 후
http://localhost:8080/home를 클릭하면 로그인 창이 나옵니다.

Default인 유저 이름과 비밀번호를 입력하면 DAGs 페이지에 들어갈 수 있습니다.
- Username : airflow
- Password : airflow
https://github.com/grant0808/airflow-dag-k8s
1
2
3
4
5
docker exec -itu0 {container id} bash

apt-get update
apt-get upgrade
apt-get install vim
여기에서 u0는 이 유저의 권한을 최고유저로 설정해서 들어가는 것으로 apt-get을 사용할 수 있습니다. vim으로 airflow.cfg에 들어가 원하는 옵션을 설정하시면 됩니다.
Dag 불러오기
1
2
3
4
apt-get git
cd dags

git clone https://github.com/grant0808/airflow-dag-k8s
dags파일에 이동하여 Dags를 git에서 가져옵니다.

위와 같이 Dags가 생성된것을 확인할 수 있습니다.
Airflow UI → Admin → Connections → Add Connection
- Conn Id: mysql_conn
- Conn Type: MySQL
- Host: your-mysql-host
- Schema: your-database
- Login: your-username
- Password: your-password
- Port: 3306

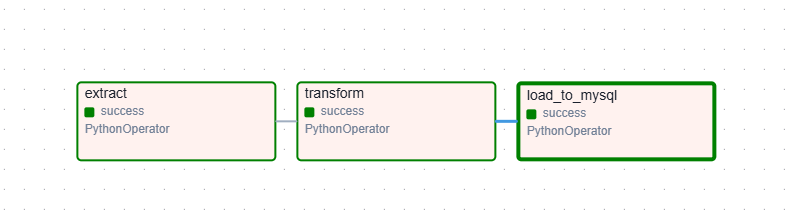
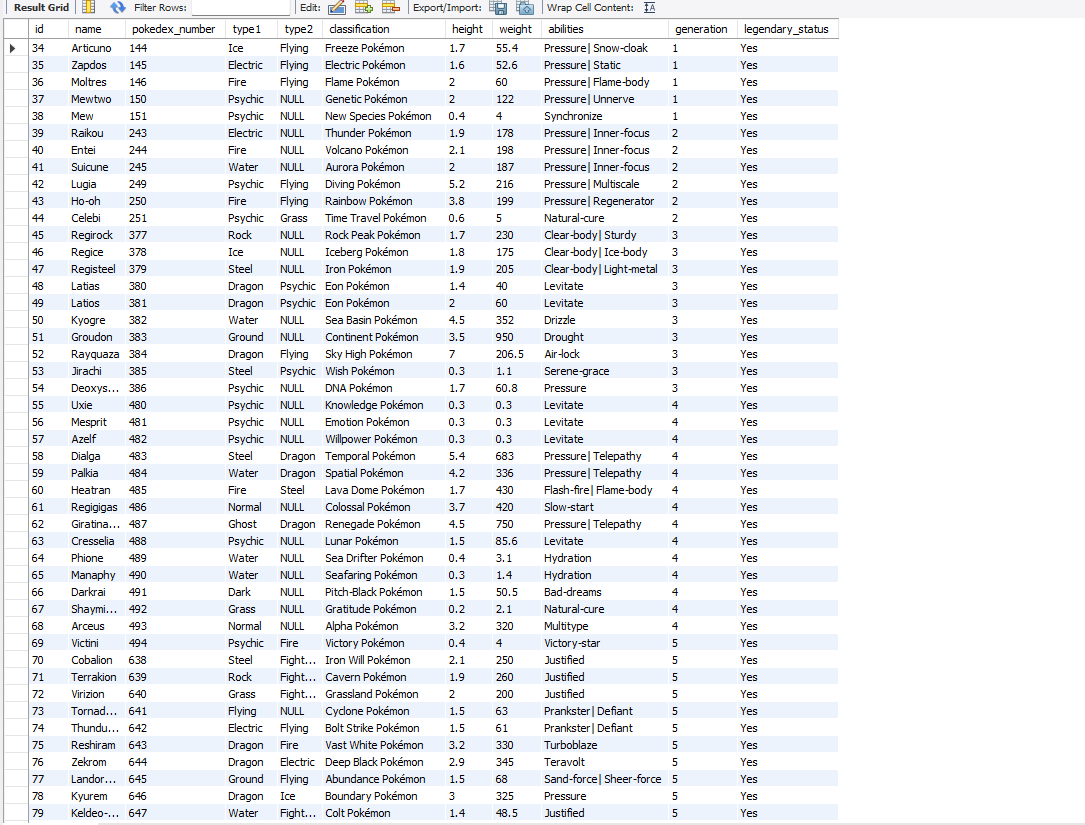
dag를 실행하면 아래와 같이 실행결과와 Mysql에 저장된것을 확인할 수 있습니다.
Error 해결
- “Host ‘host.docker.internal’ is not allowed to connect to this MySQL server”

1
2
3
CREATE USER 'username'@'%' IDENTIFIED BY 'password';
GRANT ALL PRIVILEGES ON *.* TO 'username'@'%';
FLUSH PRIVILEGES;
이는 mysql 서버에 접속할 수 없어서 생긴 문제로 권한을 부여하면 문제를 해결할 수 있습니다.
참고자료
이 기사는 저작권자의 CC BY 4.0 라이센스를 따릅니다.